WLAN KVM Switch
A small hack to control a 2-port KVM switch via HTTP over WLAN
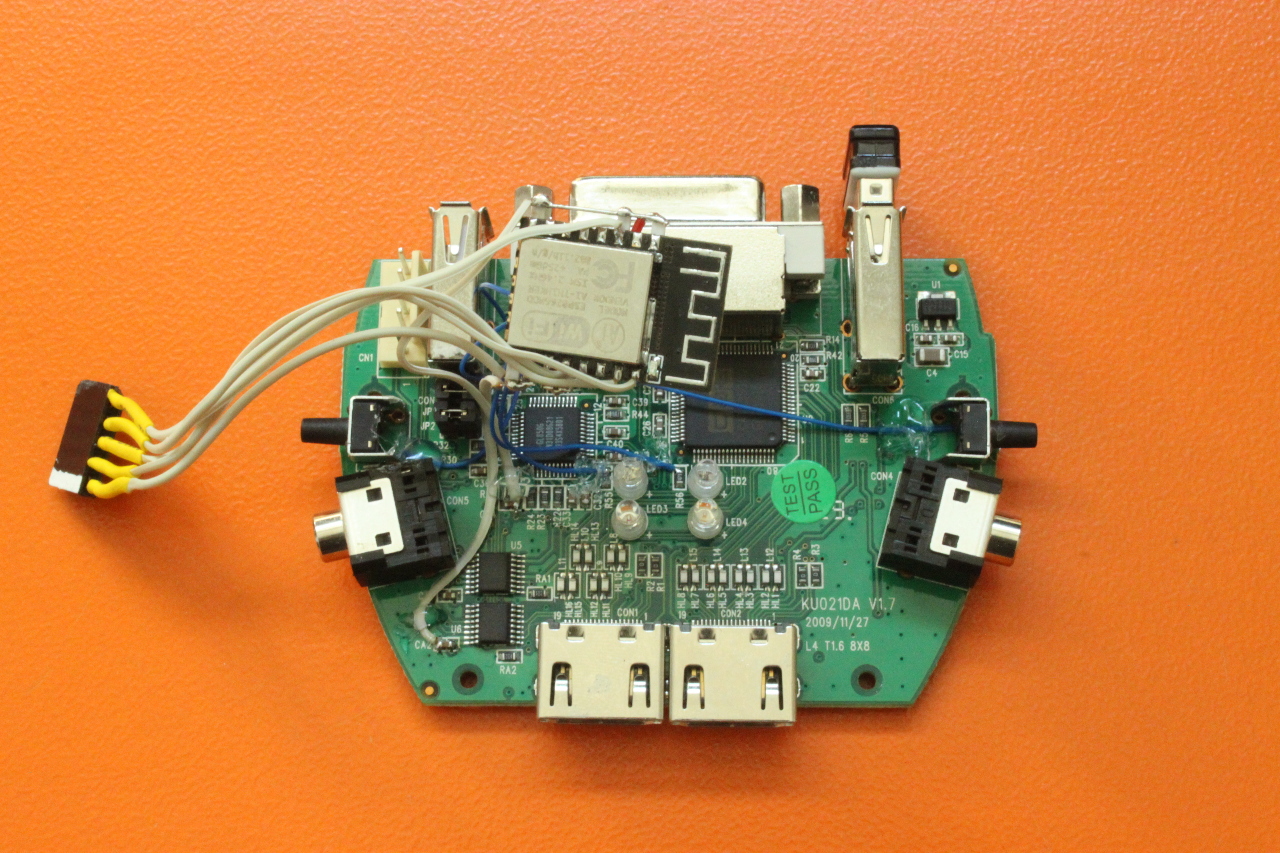
Recently I bought a small and inexpensive 2-port KVM (DVI/USB) switch that I installed with the intention to switch between my Linux and Windows workstations. Marketing promises that I could switch by pressing Scroll-Lock or Ctrl on my keyboard two times. The sad reality is: this only works if the currently active workstation is the Windows one (WTF!?).
This article briefly describes how you can add an ESP8266 module to a KVM switch, which allows toggling between the two computers by sending a REST/JSON request via WLAN. You can then define global keyboard shortcuts that simply call httpie to send the toggle request to the switch.

The KVM switch contains two buttons for manually switching the active port. They simply connect two input pins of the KVM's microcontroller to ground. So you could simply connect two ESP8266 GPIO pins in parallel to the buttons to programmatically switch between the KVM ports. The only caveat is that you should ensure that the ESP8266 output is never set to high, if someone is pressing the button (you could put a resistor in-between to limit the current in this case).
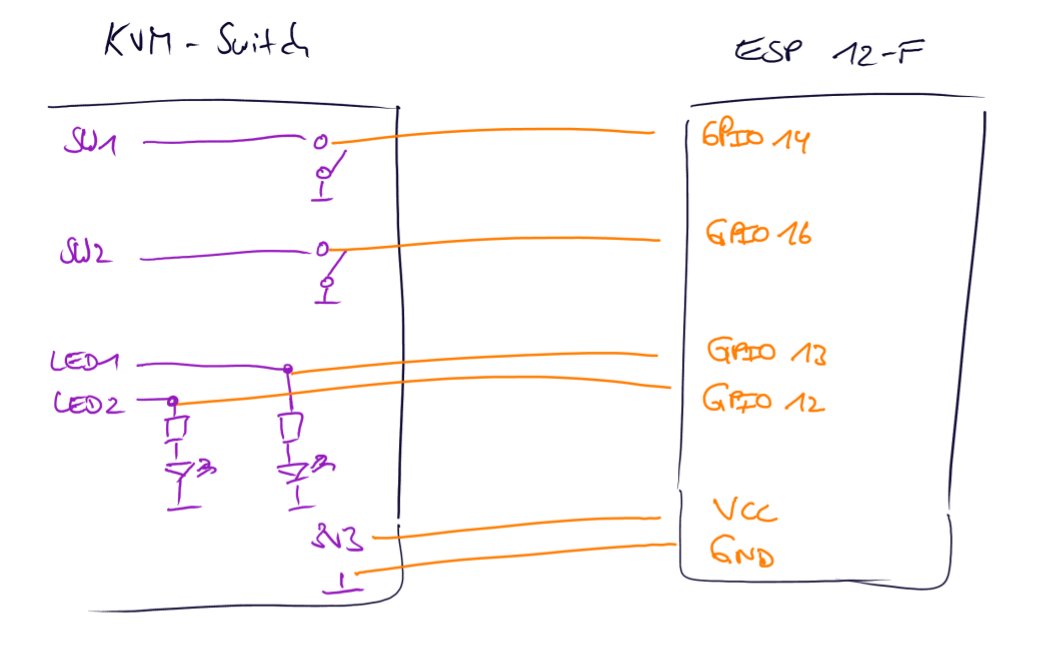
I also connected the two LEDs that indicate the active port to two ESP8266 GPIO input pins.
Here is a rough sketch showing the circuit connections between the ESP 12-F and the KVM switch:
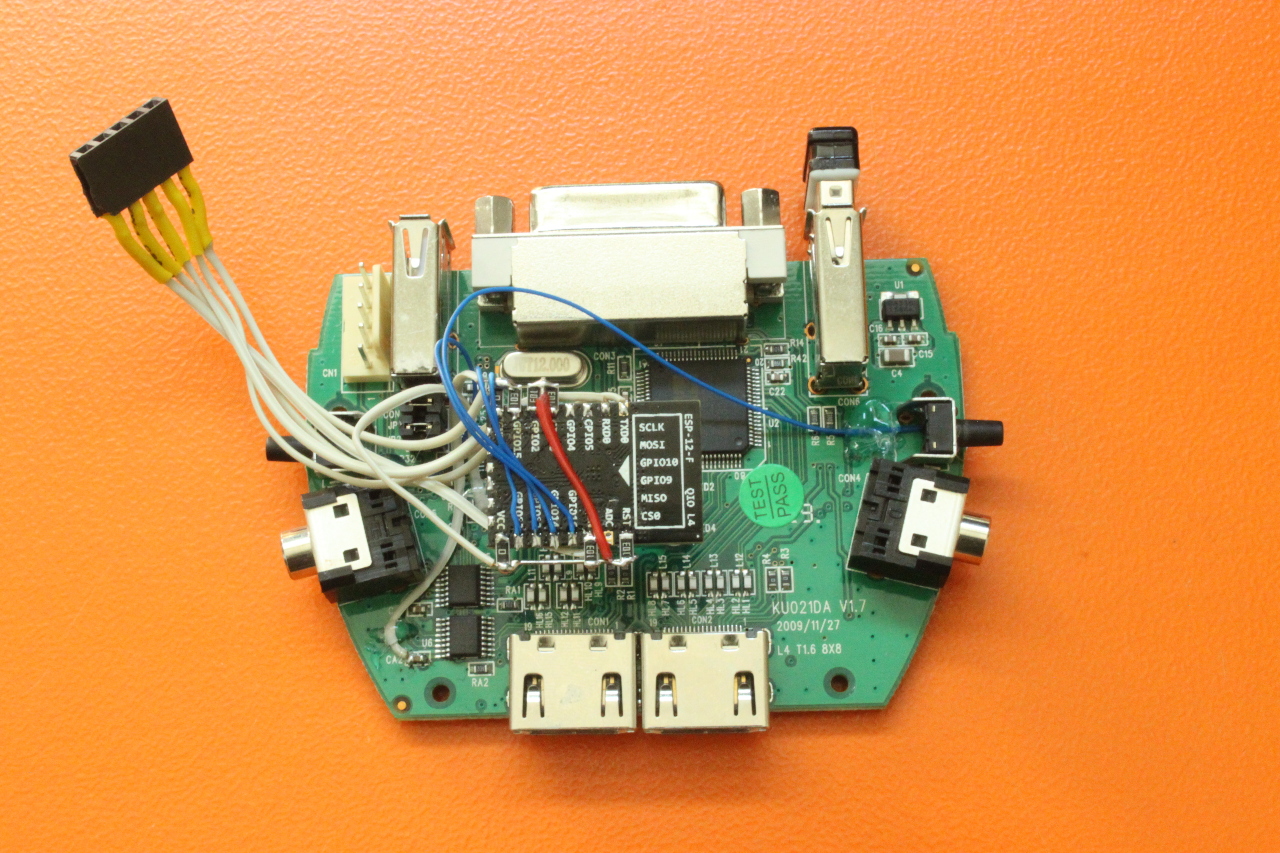
The connector on the left is the serial programming header for the ESP8266. I enabled OTA in my firmware, but in case something goes terribly wrong, you're happy to have an alternative way to flash a new firmware.
Eventually I protected the circuit with some heatshrink and fortunately the case had enough room for all the new circuitry 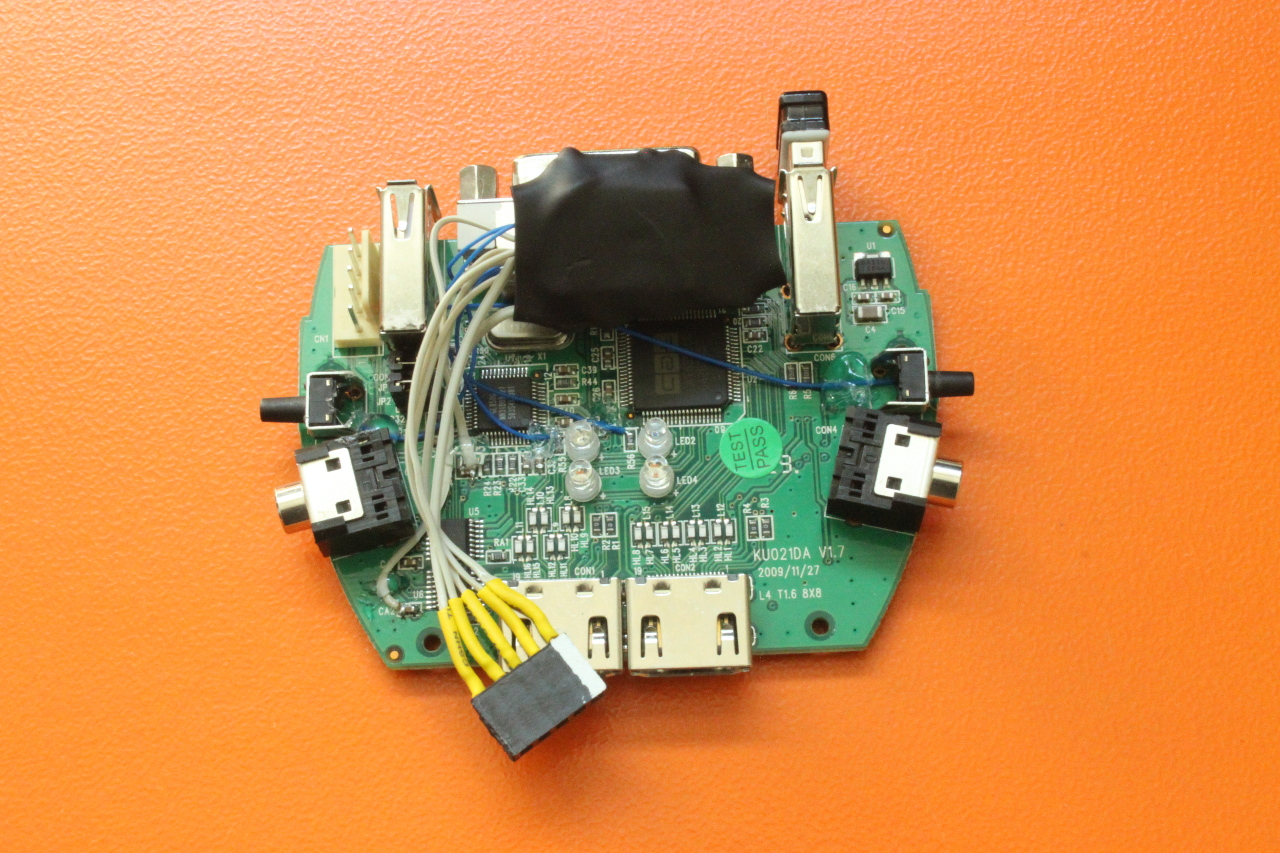
The following listing contains the essential portions of the firmware code (which is using the Arduino ESP8266 core and the Arduino JSON library):
...

const int PIN_STATUS_LED = 2;
const int PIN_SENSE_LED_1 = 13;
const int PIN_SENSE_LED_2 = 12;
const int PIN_PRESS_BUTTON_1 = 14;
const int PIN_PRESS_BUTTON_2 = 16;

ESP8266WebServer server(80);

...

int checkActivePort() {
  if (digitalRead(PIN_SENSE_LED_1) == LOW && digitalRead(PIN_SENSE_LED_2) == HIGH) {
    return 1;
  } else if (digitalRead(PIN_SENSE_LED_1) == HIGH && digitalRead(PIN_SENSE_LED_2) == LOW) {
    return 2;
  } else {
    return -1;
  }
}

void activatePort(int port) {
  switch (port) {
    case 1:
      pinMode(PIN_PRESS_BUTTON_1, OUTPUT);
      digitalWrite(PIN_PRESS_BUTTON_1, LOW);
      delay(100);
      digitalWrite(PIN_PRESS_BUTTON_1, HIGH);
      pinMode(PIN_PRESS_BUTTON_1, INPUT);
      break;
    case 2:
      pinMode(PIN_PRESS_BUTTON_2, OUTPUT);
      digitalWrite(PIN_PRESS_BUTTON_2, LOW);
      delay(100);
      digitalWrite(PIN_PRESS_BUTTON_2, HIGH);
      pinMode(PIN_PRESS_BUTTON_2, INPUT);
      break;
    default:
      break;
  }
}

...

void setup() {

  pinMode(PIN_SENSE_LED_1, INPUT);
  pinMode(PIN_SENSE_LED_2, INPUT);
  pinMode(PIN_PRESS_BUTTON_1, INPUT);
  pinMode(PIN_PRESS_BUTTON_2, INPUT);

  ...

  server.on("/state", HTTP_GET, [](){
    StaticJsonBuffer jsonBuffer;
    JsonObject &json = jsonBuffer.createObject();
    json["port"] = checkActivePort();
    String responseString;
    json.printTo(responseString);
    server.send(200, "application/json", responseString);
  });

  server.on("/state", HTTP_PUT, [](){
    StaticJsonBuffer jsonBuffer;
    JsonObject &json = jsonBuffer.parseObject(server.arg("plain"));
    if (json.success()) {
      if (json.containsKey("port")) {
        activatePort(json["port"]);
      }
      server.send(204);
    } else {
      server.send(400);
    }
  });

  server.on("/toggle", HTTP_PUT, [](){
    int newPort = checkActivePort() == 1 ? 2 : 1;
    activatePort(newPort);
    StaticJsonBuffer jsonBuffer;
    JsonObject &json = jsonBuffer.createObject();
    json["port"] = newPort;
    String responseString;
    json.printTo(responseString);
    server.send(200, "application/json", responseString);
  });

  ...
}
One can check the currently active port with a simple GET request:
GET /state HTTP/1.1
Content-Type: application/json
Content-Length: 0
HTTP/1.1 200 OK
Connection: close
Content-Length: 10
Content-Type: application/json
{
"port": 1
}Finally the toggle request looks like this and returns the new active port number after switching the ports:
PUT /toggle HTTP/1.1
Content-Type: application/json
Content-Length: 0
HTTP/1.1 200 OK
Connection: close
Content-Length: 10
Content-Type: application/json
{
"port": 2
}